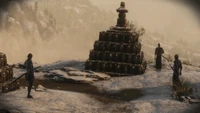
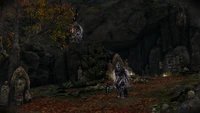
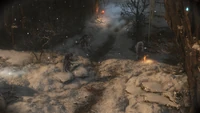
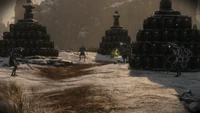
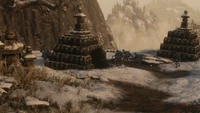
| The evening hours are perilous.
As the darkness of night approaches and the sun begins to wane, powerful vengeful spirits visit the land seeking revenge. |
Description[]
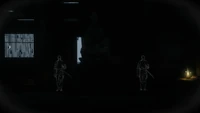
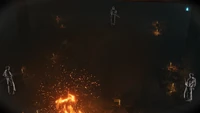
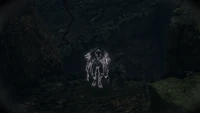
Vengeful Apparitions are ghostly entities that only manifest at twilight.
To reach that time of day at least three of the following Bosses must be defeated:
Depending on the order these Bosses are challenged, different types of these Apparitions will spawn in certain spots.
There are three types of Vengeful Apparitions:
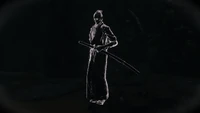
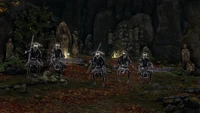
Isshin's Pupil Spectre[]
Location:[]
- Sunken Valley (Under-Shrine Valley): three will appear in the cemetery with the lonely Snake Eyes Spear-Bearer, where a Prayer Bead is found by a tombstone.
- Sunken Valley (Gun Fort): two will appear inside the shrine, after Long-arm Centipede Giraffe is killed.
- Abandoned Dungeon (Underground Waterway): one will appear just before the elevator that leads to Senpou Temple.
- Senpou Temple (Shugendo): one will appear just before the Armored Warrior on the cliff where the Red and White Pinwheel is found.
- Senpou Temple (Temple Grounds): three will appear inside the temple where Long-arm Centipede Sen'un is found, after the Mini-Boss is defeated.
- Senpou Temple (Temple Grounds): two will appear on the path to the Main Hall, after the three Adept Senpou Monks and the Shield-Wielding Taro Soldier nearby are killed.
- Ashina Depths (Water Mill): one will appear at the end of the bridge past O'Rin of the Water.
Behaviour and Tactics[]
Junior Pupil[]
 Perilous Thrust: thrusts a far reaching distance in front of him.
- Forward Slash: steps forward, slashing diagonally.
- Jab: jabs forward with his elbow, follows by an off-handed slash. Sometimes he may slashes before chaining this attack.
- Overhead Swing: raise his katana and waits for a brief moment, then brings down his sword in a slash.
- Recover: becomes engulfed in a bright aura while restoring Posture.
- Retreat: slashes down and steps back concurrently.
Senior Pupil[]
 Perilous Thrust: thrusts a far reaching distance in front of him.
 Perilous Thrust Combo: raise his katana and waits for a brief moment, then slashes three times, follows by a Perilous Thrust.
- Five Hit Combo: yells before slashing down five times consecutively.
- Forward Slash: steps forward, slashing diagonally.
- Jab: jabs forward with his elbow, follows by an off-handed slash. Sometimes he may slashes before chaining this attack.
- Overhead Swing: raise his katana and waits for a brief moment, then brings down his sword in a slash.
- Retreat: slashes down and steps back concurrently.
They fight exactly like any Isshin's Pupil.
It's best to approach them cautiously, as they may choose to close the gap with Wolf using their Perilous Thrust.
Keeping constant pressure on them traps them in a loop of only alternating between their Jab attack and their Perilous Thrust.
Since they're mostly fight in groups, using a Gachiin's Sugar to sneak behind them or forcing them to give Sekiro their back via Divine Abduction allows to quickly turn the tides with Backstab Deathblows.
Loot[] | |||
| +620 Skill Experience | |||
| Yashariku's Sugar | |||
Nightjar Spectre[]
Location:[]
- Sunken Valley (Under-Shrine Valley): one will appear next to the first Snake Eyes Spear-Bearer right past the Sculptor's Idol.
- Sunken Valley (Sunken Valley): three will appear in the area with the Sculptor's Idol, after the surrounding Snake Eyes Followers are killed.
- Senpou Temple (Senpou Temple, Mt. Kongo): to the side of the path patrolled by Monks, two will appear when Wolf approaches the tree with two Antidote Powders and a Light Coin Purse underneath.
- Senpou Temple (Senpou Temple, Mt. Kongo): four will appear in the area with the first two Dual Naginata Senpou Monks, after they, the Torch-Wielding Bandit and the Archer Bandit are killed.
- Senpou Temple (Temple Grounds): three will appear on the path with the Club-Wielding Taro Soldier and the Monkeys, as Wolf approaches the broken bridge.
- Ashina Depths (Guardian Ape's Burrow): two will appear just before the Hidden Forest Sculptor's Idol, where Jinzaemon can also be found.
- Ashina Depths (Hidden Forest): three will appear where Tokujiro is found, after the Mini-Boss is defeated.
- Ashina Depths (Hidden Forest): two will appear shortly before the Mibu Village Sculptor's Idol.
- Ashina Depths (Mibu Village): four will appear at the plantation where the Ashina Sake is found.
Behaviour and Tactics[]
Brown Nightjar[]
- Cross Slash: lunges forward, slashing both sickles.
- Leaping Slice: leaps up then come crashing down with a slice.
- Sickles Throw: he leaps around while throwing a pair of homing sickles.
Grey Nightjar[]
- Leaping Whirlwind: leaps backwards for a brief moment, then he lunges forwards spinning the weapon.
- Nimble Strike: jumps to the left then quickly lunges forth, slashing once.
- Overhead Cut: spins in the air then comes crashing down with a cut. When the target is too far away, he spins directly at him and does this attack twice.
- Somersault: slashes from below then leaps backwards.
- Twin Cyclones: hops to the left then spins his weapon twice before leaping backwards.
- Whirlwind: hops to the right then spins the weapon, and may follow up with Overhead Cut and a spin.
Black Nightjar[]
 Fiery Weapon: throws gunpowder into the air that explodes, engulfing his weapon in flames.
- Leaping Whirlwind: leaps backwards for a brief moment, then he lunges forwards spinning the weapon.
- Overhead Cut: spins in the air then comes crashing down with a cut. When the target is too far away, he spins directly at him and does this attack twice.
- Somersault: slashes from below then leaps backwards.
- Spin Slash: in a backwards leap, he spins his weapon around in circles.
- Whirlwind: hops to the right then spins the weapon, and may follow up with Overhead Cut and a spin.
They fight exactly like any Nightjar.
Trapping them in a corner will make it easy to stagger them to death with little to no retaliation.
Performing Consecutive Deflections on their Leaping Whirlwind and Twin Cyclones attacks will inflict major Posture damage.
The Whirlwind Slash Combat Art can stunlock them, if used in rapid succession, as they can't fully block its damage. His vast swinging range also helps when outnumbered.
Ichimonji and Ichimonji - Double will fill up their Posture bar in a couple of hits.
It's important to be cautious against their Sickles Throw move, since if it connect while Wolf is mid-air it will deal extra damage. Mid-air Deflection can circumvent this.
Carry some Dousing Powder, Ministry Dousing Powder or the Withered Red Gourd while fighting the Nightjar Spectres next to the Sunken Valley Sculptor's Idol.
Loot[] | |||
| +620 Skill Experience | |||
| Yashariku's Sugar | |||
Mibu Villager Spectre[]
Locations:[]
- Sunken Valley (Under-Shrine Valley): four will appear in the cemetery with the lonely Snake Eyes Spear-Bearer, where a Prayer Bead is found by a tombstone, and four more will spawn after the previous are slain.
- Sunken Valley (Under-Shrine Valley): four will appear before the first Snake Eyes Spear-Bearer right past the Sculptor's Idol.
- Sunken Valley (Sunken Valley): four will appear in the area with the Sculptor's Idol.
- Sunken Valley (Gun Fort): two will appear inside the shrine, after Long-arm Centipede Giraffe is killed.
- Abandoned Dungeon (Underground Waterway): one will appear just before the elevator that leads to Senpou Temple.
- Senpou Temple (Senpou Temple, Mt. Kongo): six will appear in the area with the first two Dual Naginata Senpou Monks.
- Senpou Temple (Shugendo): two will appear just before the Armored Warrior on the cliff where the Red and White Pinwheel is found.
- Senpou Temple (Temple Grounds): five will appear on the path with the Club-Wielding Taro Soldier and the Monkeys, as Wolf approaches the broken bridge.
- Senpou Temple (Temple Grounds): six will appear inside the temple where Long-arm Centipede Sen'un is found, after the Mini-Boss is defeated.
Behaviour and Tactics[]
Fisherman[]
- Hit with Stone: when engaged, it picks up a small rock and attempts fighting with it.
- Swing: some wield a small mallet they swing in a short arc or a rake that it will use to attack in a flurry.
Plow-wielding Villager[]
- Overhead Swing: raises the plow above its head to do a single overhead swing in front of itself.
Lantern-wielding Villager[]
 Throw: reaches down onto the ground to grab a stone then hauls it at its target, inflicting Terror build-up.
Plank-wielding Villager[]
- Wide Swing: swings its makeshift plank slowly to the side, staggering itself in the process. If it connects with a block or hit, it'll chain it into another, reverse Swing.
Stick-wielding Villager[]
Burrowed Villager[]
Mibu Village Hag[]
 Perilous Hysteria: charges at the target with open hands. If connected, she will make Wolf stumble to the floor where she'll stab him repeatedly.
- Flurry: repeated slashes with her knife.
- Forward Stab: lunges forward with the knife, stabbing her target.
They fight exactly like any Mibu Villager.
While they're not a threat by themself, in great numbers they can easily overwhelm Wolf.
The first target should always be the Burrowed Villager, as his Grab Attack will expose Sekiro to any attack of all the other enemies.
Then it's important to get rid of the Lantern-wielding Villager, as he'll constantly throw Terror-inducing projectiles, while Wolf is busy fighting the rest of the horde.
After these, the only thing to watch out for is the Mibu Village Hag's Perilous Hysteria Grab Attack.
The Whirlwind Slash comes in handy when facing many of these Villagers together.
Due to their low Vitality, they can be taken out safely with Shurikens.
Loot[] | |||
| +620 Skill Experience | |||
| Yashariku's Sugar | |||
Notes[]
- Can't become the target of any Ninjutsu.
- Despite their phantasm-like appearance, Malcontent nor Snap Seeds will have any effect on them. Furthermore they are both vulnerable to Burn and Poison.
Trivia[]
- One of the few enemies that can drop Yashariku's Sugar.


